Thursday 20 November 2014

Costume Making 101 - Reasons (excuses) for a slow blog week...

1.  Applying graphics at the office


The handywork of yours truly and my friend Scott over at www.mudbagrunner.blogspot.co.uk

2.  Designing.  New Comic-Con, new coat, you know the rules. 


And the final design:


Drawn by me over prints of the pattern I plan to use, everyone's favourite, Simplicity 2333.

3.  Internet distractions of things I want.


4.  Oh, and this.


Nice cameo by the Axe-gun.  Everyone loves an Axe-gun. 


Next week will be more productive.  Honest.  In between house viewings, estate agents, finishing sequence 6 of AC Unity (buy it, buy it, buy it!) and various other things.  I think I've also started my Dishonored Corvo Attano prop purchases, so more to come on those too!

Breath. 


Until next time. 

Wednesday 12 November 2014

Costume-Making 101: The Hood Continue-eth

A day of progress it seems - day away from the daily grind to sort some bits out has meant some time to dedicate to the work-in-progress...

To business - I'd got the hood lining finished and the pattern for the shell cut.  Time for some assembly methinks!


First off, the sub-assemblies; these were put together in the same manner as the lining - the two centre pieces with the added detail pieces for the tip (which weren't part of the simpler lining), plus the side panels with the additional detail panel to help give some structure to the top when assembled.  These were then sewn together and tested with the lining/interfacing:


Which seemed to work out well.  Turning my attention to the back, I sewed the two centre back pieces together, plus the additional dart details:


You'll notice the darts are double-stitched to add rigidity and detail, as were all of the other seams around the hood.  In designing the pattern I'd kept the seam placement to where the hood would naturally need to "fold" around the head so by over-stitching hoped to give it some real shape.

So, centre back attached, shoulders pieces added:


The right-hand picture is actually following the sewing together of the lining and shell.  The edges are left raw as I'd decided to bias-bind the edges to add a cleaner line to the edges and allow a few more lines of stitching.

A trip to Hobbycraft later and I had some bias tape, new sewing machine needles and other bits I needed.  After measuring up and some ironing, more sewing and double sewn edges, we had this:


And onto the other side, by which time it was dark, so the flash on my phone started giving some funny effects to the colour of the fabric.  The photos above show the true colour.


And that's where we have to end for tonight - I have shirts to iron.  Needless to say, I'm pretty happy with how everything's going.  At this point I need to finish off the bias binding for the rest of the hood, add button holes and other details (more on these to come) to finish it off.  The extra seam lines have really added some support to the hood, meaning that in the last photos the top of the hood is barely in contact with the Jelly Bean/head stand-in.

Another update soon, hopefully with some final shots of the hood at work!


Until next time.


Monday 10 November 2014

Costume-Making 101:  Hood Progress

Just  a quick update for tonight, it's late and I'm tired.  A weekend of entertaining a (nearly) three-year-old monster, house-hunting and bad horror films has taken its toll...

So then, first off an update for the hood lining, complete with the extra-intricate double-stitched hems for strength and structure (done by eye, I might add):


And I finally finished cutting all of the pieces for the "shell" of the hood.  It's a dark blue cotton drill, same as the lining, which despite the flash from my camera is actually a rich, deep red.  


And that's not even a particularly complicated hood pattern...  If you've noticed how some pieces look to be copied parts of other pieces, then well done, have a biscuit.  I'll be doubling up some parts of the hood for added structure and detail lines.  

More to come when I start getting the hood assembled; he shape should hopefully start coming together, including the staggeringly well-designed three-part mantel for easier movement.

Oh, and a motivational picture from Ubisoft's website.  You can buy this product.  It's life-size.  And yours for a fiver under £2,000.  House or statue?  Seriously, house or statue..?


Stay tuned for more!


Wednesday 5 November 2014

Costume Making 101: It's Alive!  Sort of.

I've been thinking about hoods a lot recently.  Stick with me.

Last time I'd just started patterning out my new hood design after several attempts that I wasn't entirely happy with up until now.  Nothing to do with the patterns themselves, more with how I put them together.  So, without further ado, progress!


I'm convinced these tutorials online that insist you need add wires and various other things to your hoods to make them stand correctly are wrong, simply because despite what everyone thinks, hoods are incredibly hard to pattern out to look like they do in a computer game.  That said, I'm not for a minute suggesting my way is correct, more that I'm going to explore the options for making a hood without wires to see if I can crack it.  

Despite what I just said, hoods themselves in principal are incredibly simple.  They are two quarter circles for the sides with a middle strip to add width.  Computer game hoods are not.  They are form fitting, gravity defying and covered in seam lines, panels intricate details.  All this adds up to a seemingly impossible set of shapes to draw up and scale correctly.  Simplicity, I'm convinced, is the key:


Even this could be simpler when you get down to it...

The plan then: the lining is (almost) complete, just a few detail lines of stitching and the back piece to add (which I've actually just done but haven't photographed yet), then it's on to the outside.  My theory is that with the correct layers and stitching reinforcement then the hood should sit correctly...

The outer layer will be comprised of the same basic shapes as the lining, but with added panels to make it look more complicated and involved.  These additional panels will also add structure by being double stitched to provide a good, solid seam line.

More to come later in the week, I'll keep y'all posted as to how it works out - patterns will be uploaded whether or not it works so people cleverer than me can have a go!


Until next time. 


Saturday 1 November 2014

Costume-making 101: The next steps

So here we are a week on from Comic-Con - thoroughly enjoyable day meeting a huge number of like-minded people out to demonstrate their costume and prop-making skills.  Next time, Friday trip, not a Saturday; too hot, very crowded and queueing for nearly two hours to buy food and get cash out...  Still, onward and upward to May's event!

Where next then for the intrepid adventures of the costume blog?  Well, a few things to learn from this year's convention and a host of new projects to get started on!

First off, little 'un is sorted for costume now as she chose to wear the brown corduroy overcoat I made earlier on in the year - somehow despite being made for me it actually fit her quite well...  teamed with the pirate shirt I'd made, the sash and belt arrangements from her previous outfit, she was sorted:


The other half seemed to be fine too, until we realised that her coat had ripped at the shoulder seam, largely I imagine to it having been made in a bit of a hurry and not designed to fit over a corset the way that she wears it.

Rather than re-making the same coat, we decided to see what else was out there pattern-wise, in no small way owing to how difficult the previous coat was to put together!


Don't get me wrong, it looks great once finished, but after making and fully lining two of these coats I'm really looking forward to trying something else out - there are so many fiddly panels to get right...

After some searching, we came up with this one:


McCall's M6819, upon further investigation the only pattern apparently MORE complicated than the one we'd used previously...  We'll be going more for the look in the left picture above and I plan to make the bodice/coat and skirts separately to make the whole thing easier to store and wash.  Six meters of fabric should be fun!


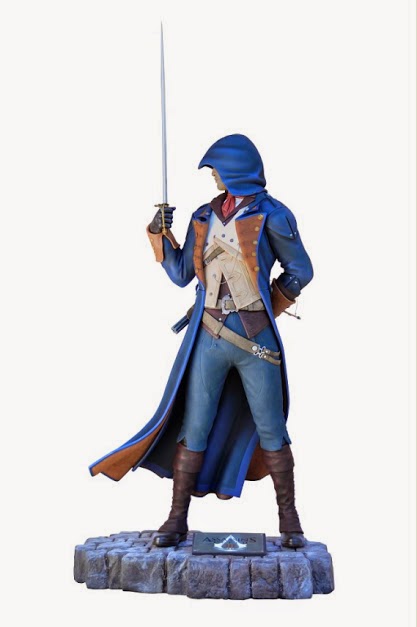
Now I liked how my short coat had worked out - this picture especially as it was taken as about a dozen people asked to take photos of me and the missus, thinking we worked for Ubisoft and were there to promote the new Assassin's Creed game - I'll take that as a compliment!

My problem with this design was that to my mind it strayed too far from the original design aesthetic I'd been trying to re-create - everyone else had something based around a long, flowing coat while mine was just too different.   And the hood, I still haven't perfected that. Back to Google and I ended up buying a new pattern:


I liked the look of the lapels, the length and the added bonus of a removable cape, so this'll be my next attempt to get back to the design roots.  I'll be sticking with the colour palette from my previous coat with the main colour being a dark blue, lined with a mixture of dark brown and a paler blue, though doubtless this will change as I get further along.  

Last but not least, my friend Scott's costume.  Unfortunately he wasn't able to join us this time at the convention, but I was planning to update his look either way.  His costume was the first one I'd finished:


As my designs have progressed and taken a slightly different route Scott's Ezio-inspired waistcoat has definitely started to show it's age, plus I'm not happy with the quality of the work compared to the standard I work to now.  I was planning to sit down with Scott to work out what he wanted to go for this time around but decided in the end to make life easier (for me) and remove the element of choice.

This is what I bought as a base pattern:


Burda 2471 - I've wanted a copy of this for some time.  The Napoleonic French line infantry uniform is one of the most recognisable and beautifully designed military coats I've ever seen and I'm really looking forward to giving it a try.  I actually bought two copies of this pattern while I had the chance, that way I can produce Scott's new coat and have my own copy to make for pleasure.  Handily, this pattern also features a waistcoat and trousers, should that be a direction we choose to go in.  Now all we need is a colour choice, as I've already been given a definite "no" to green...

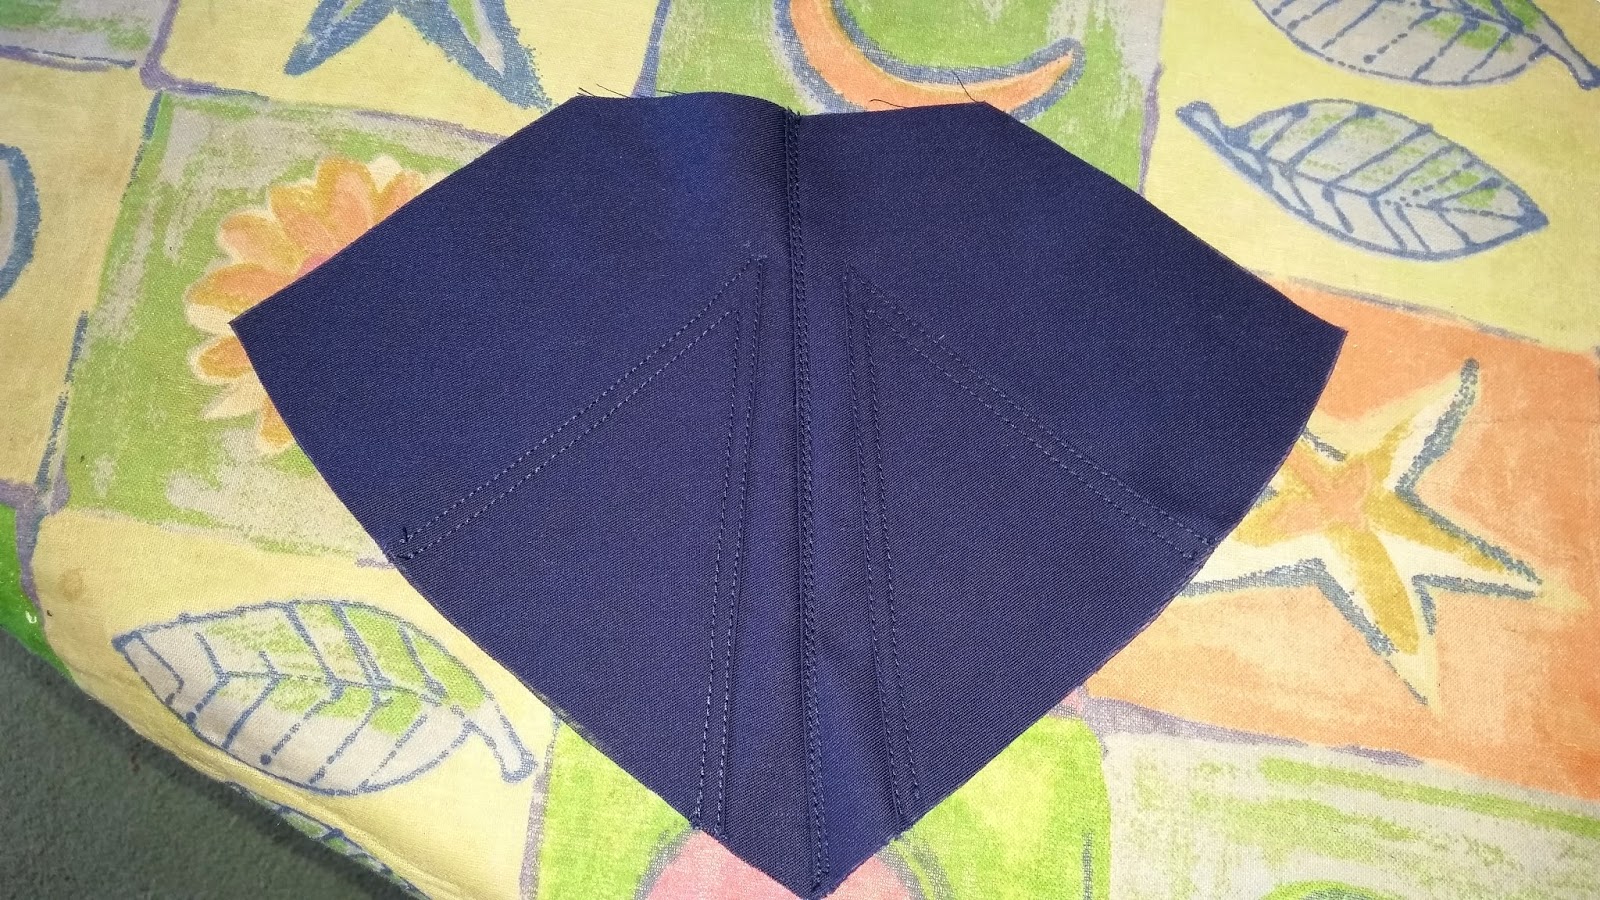
And as always, there's still the question of the dreaded hood.  I've made six now, none of which I'm entirely happy with.  If anyone ever perfects the Assassin's Creed style hood, trust me, sell the patterns and you'll make a fortune from nerds like me.  Some frantic and inspired late-night pattern designing has left me with this:


I'll be putting together a test run soon, so hopefully an update to follow and more on the next round of coats for next year's convention season!


Until next time.